
_______________________________________
Standard Warning for all candles: Always burn within sight. Never leave burning candle unattended. Burn on a level and heat-proof surface. Keep away from curtains or flammable objects.
_______________________________________
alOha ; )
Thanks for taking the time to checkout our Burn Tips page .. these simple steps will help you get the very best and bee-autiful burns!
**You can find our entire candle line below including any special tips or tricks per candle ; )
We'll start with the most general (and important) notes, that way if you get overwhelmed, you'll at least know the basics ; )
Cliff's Notes Version:
Beeswax candles should bee burned for at least 1 hour per session for every inch that the candle is wide ... for example, a candle that has a 3 inch base, (like our mason jars) should be burned for at least 3 hours at a time. If you don't burn the candles for long enough, you'll end up tunneling through the center of the candle, and leaving behind thick walls/ wasting all that burnable wax ; (
Also, if you burn a bigger candle for too short of sessions, it can gum up the wick and refuse to stay lit ... if this happens, just trim the top of the wick off, and carve out a section of the wax all around the wick (maybe the size of a quarter wide) and then relight. Make sure you let it go for a long time on this first relight, and stick to the hour per inch rule from there on out ; )
Feel free to message us on etsy, facebook or gmail (pollenarts@) for guidence ; )
Always burn your candles on a level surface, this is most important with our smaller and more narrow candles, since they won't have room to develop a wax cup/ pool to hold in the wax. ; )
Don't let a breeze or draft blow the flame from your candle unevenly to one side. That side will melt away, and the wax will spill : (
Keep the wick short (1/4 inch) and centered. When your wick starts to curl, that's the time to trim the top off. If the wick is still leaning, take your scissors and poke/ nudge it in the other direction to center it out ; )
You may also notice:
If you've lost track of your candle, and already have a lopsided burn pool, you can poke the wick toward the thicker side of the candle wall to - 1. melt away the lopsidedness, and 2. give the overly thin side a break from the heat ; )
If you get a little spill that seems to want to keep going, blow out your candle, let it cool, and the next time you light it up, the flame will quickly cut a new pit to hold your wax pool ; )
Any drips can be picked off the plate or counter top and dropped back into the wax pool for added burn hours ; ) Just be careful not to add too much - this will sink and drown your wick.
... oh .. two non-burn related notes:
One: a lot of people like the idea of displaying their candles in the window, and this could be good at night, but beeswax is an organic substance that can fade (to an off-white) if the sun beats on it for too long ; (
Two: You may notice a white crystal-like powdery patina on your candles as they age. This is called 'Bloom' and it's the best sign that you're dealing with 100% raw beeswax ; ) We love bloom and think it accents the text and imagery on our bottles, but if you want to bring back the original finish, you can use a hair dryer on warm (from about 4 or 5 inches away) and you'll notice that the soft white bloom will magically disappear. It can also be wiped off with a clean palm or lint free rag (like silk) but the heat method is the best for getting in all the little nooks and crannies ; )
This is most of the same info as above - but more comprehensive ; )
The Wick: (the most important part of the burn) One thing that you want to have is a centered, short (1/4 inch) wick. If the wick is too long, you'll have a huge flame .. which will suck up your wax quicker and it can place too much heat one side wall, creating a spill ; (
A Note on Spilling/ Drips: Normally, the flame from your candle will suck the wax up quick enough to create a little cup to hold the wax pool. If the cup's edge is broken - could happen from a non-centered wick with a flame that's too tall or from burning a small candle too long - just blow out the candle, let it cool for 20 minutes or so, and then ligh t it back up ; )
If you do get a little dripping, or a spill, you can pick the hardened wax off the plate or counter and throw the little chips back into the wax pool for extra burn ; ) It's best to do this when the wick is long. If the wick is short, and you add wax, the liquid wax level will rise and can drown your flame.
Trimming: The wicks on beeswax candles are thick (they need to be able to suck up honey and other organic things in the wax), but since they're thicker, they don't "self trim" like some other candle wicks. What they do-do, though, is Curl downward. This is a safety feature which produces a lower (but wider) flame when the wick is getting too long.
When you see that the wick is long and curing, just trim off the arched top of the wick (just below the bend - where the wick is still straight). Most times, you can wait to trim the wick until you're ready to relight the candle on another day, but if you're burning for long periods (or burning through the long narrow neck of one of our larger candles) you'll want to keep an eye on the wick length and trim when necessary. A lot of times, the trimmed top of the wick will fall into the wax pool - no big deal - but just make sure to pluck it our with your scissors ; )
You might also need to trim the wick if you notice that the flame seems to be struggling, and the tip of the wick is an ashy grey rather than a dark black. Beeswax wicks suck the hot wax upwards and the tip of the wick can get crusty and clogged up with crispy cooked honey, pollen and nectar. This inhibits the suction of the wick, but trimming the crispies off the tip will send your flame soaring ; )
Centering: (just as important as trimming) As I mentioned above, beeswax wicks are designed to curl when they're getting too long, and even after you trim the wick down, you still might notice a little lean in the now-shortened wick.
A nice centered wick will produce a even wax pool with uniform wax walls (this keeps your wax pool from spilling). If your wick is leaning to one side, you'll notice the hole that the flame is cutting into the wax will be off centered, and the wall on the side that the flame is leaning will be thinner.
If you don't center the wick out, that wall will eventually melt away and the wax pool will spill ; ( The easiest way to maintain this is to take the tip of your scissors (or another non-flammable poker) and just nudge the burning wick up straight ; ) It's a good idea to do this just after you blow your candle out for the night. This will make it so the soft, hot wick will stand straight and centered before it cools down and gets ridged - perfect for next time !!
Important Setting for your candle ; )
Always make sure that your candle is on a level surface. Letting a candle burn on an uneven surface is kind of like taking a cup of water that's full to the brim and setting it at an angle .. just like the cup, the candle will spill. This is most important with our smaller candles and candles that are just starting out, but our large candles, once they've burned into the body and cupped out, have much less chances of spilling.
The flame of your candle likes to be in calm conditions ... we notice this here at the Roost when we're zooming around past a table of candles, and the wind from our passing bodies stirs the air. This is okay .. but a constant breeze or draft (like from a fan or open window) can blow all the heat onto one side of the candle, melting it unevenly and causing a spill. Plus .. the flames look so pretty and delicate when they're standing still ; )
--------------------------------SMALL--------------------------------
-- HOYT’S PERFUMERS --
Xsm

This is our smallest candle - being so thin and narrow, it won't create a wax pool like our other thicker candles but instead burn like a tapper, straight through.
It's extra important that this one is burned on a level surface and out of a breeze because the liquid wax will literally be sitting on the top of the body, not sunken into a wax cup. Keeping the wick short and straight will help keep the burn slow and centered ; )
When the flared neck turns liquid in the first few minutes, it will drip, but once you're into the narrow neck, it should burn right through - just keep the wick trimmed short ; )
Best burned for short periods - a great meditation candle for 20 - 30 minutes at a time, but you can also burn it straight through - takes about 3 hours. If it starts to drip (past the flared neck) lightly blow it out and let it cool .. next time you light the candle, it will created a better sink hole for the wax.
-- MILK WEED CREAM --
SM


This is a great little burn - and even though it's one of our smalls, it will hollow out and create its own little wax cup/ container ; ) Since the cap is a bit more narrow than the body, it's best to burn it for no more than 1 & 1/2 hours the first time (this will create a nice little hollow in the cap ; ) After that, you can burn this little baby for 2 hours at a time .. we've done longer periods, but just keep an eye on the wax walls, and don't let them get too thin/ spill the wax.
Keep wick short (1/4 inch) and if it starts leaning to one side, push it with your scissors to prop it back up straight ; ) This is a carefree burner - and will go for upwards of 20 hours ; )
Keep wick short (1/4 inch) and if it starts leaning to one side, push it with your scissors to prop it back up straight ; ) This is a carefree burner - and will go for upwards of 20 hours ; )
--VASELINE JAR--
SM


This Vaseline Jar is almost identical to the Milk Weed Cream above - please read the instructions for the MWC up there ; )

INKWELL – "DIAMOND, BELL & SWIRL"
SM

The Diamond (left) Swirl (center) and Bell (right) are much like the Vaseline and Milk Weed Cream Jars above. Best burned for 1 & a half to 2 hours at a time. Shorter burns for the first time or two (maybe an hour) will create nice little pits for the wax to sit in during future burns ; ) The three of these will drip, minority, during the first burn, but hollows out nicely after that ; )
-- APOTHECARIES --
SM

This candle is fairly narrow, so make sure it stays level and out of a breeze. Your wax pool, naturally, spreads out from the flame in a circle, and since this piece is square, you'll need to mind your burn times, so you don't spring a leak in the side walls ; )
A one hour burn is good for the first time to sink a nice little pit into the cap. After that, burning for one to 1 & 1/2 hours is best since it's a smaller candle & square. Also, it's extra important to make sure that your wick stays short and centered. The wick will naturally curl when it's getting too long - that will place too much heat on one wall which can spill your wax. When the wick curls, trim it right below the bend, and if it's short but still off center, just give it a little poke with your scissors to straighten it out. Poking and trimming goes a long way with all our candles ; )
A one hour burn is good for the first time to sink a nice little pit into the cap. After that, burning for one to 1 & 1/2 hours is best since it's a smaller candle & square. Also, it's extra important to make sure that your wick stays short and centered. The wick will naturally curl when it's getting too long - that will place too much heat on one wall which can spill your wax. When the wick curls, trim it right below the bend, and if it's short but still off center, just give it a little poke with your scissors to straighten it out. Poking and trimming goes a long way with all our candles ; )
--Mini L. ROSE "LIME JUICE"--
SM


As a narrow candle, this one needs to stay level and out of a breeze. The wick will curl as it's getting too long, so make sure and trim it off just under the bend - where it's still straight ; ) This is a small candle, and can be burned straight through like a tapper, (about 4 or 5 hours straight) but it's nice to burn it for short periods for more occasions of enjoyment ; )
--Mini FLORIDA WATER--
SM

This is a -great- little candle ; ) Its long narrow neck will burn straight through with very little dripping. Once through the neck - burning for shorter periods: 1 to 1 & 1/2 hours will give you a nice little hollow/ wax lip to hold in the liquid pool ; )
**As with all our candles - keep the wick short, 1/4 -ish. Be mindful that the wick isn't leaning off centered in one direction, which can cause uneven melting of the rim and spill the wax (true of all candles). In the event of a leaning wick, just poke at it with your scissors to set it up straight ; )
**As with all our candles - keep the wick short, 1/4 -ish. Be mindful that the wick isn't leaning off centered in one direction, which can cause uneven melting of the rim and spill the wax (true of all candles). In the event of a leaning wick, just poke at it with your scissors to set it up straight ; )
------------------------------MEDIUM---------------------------
-- ROOT BEER EXTRACT --
Md. $15


This square candle is very similar to the 'Apothecary' - two candles up from here - please read that blurb ; ) Also, this is one of the few candles that we have with a flared mouth. This unsupported wax will cause a little dripping as it turns liquid and runs down with gravity.
If you want less drips (they do look kind of cool though), just pinch the thin lip mouth and snap it off all the way around the top of the neck. (you can tap it with the back side of a butter knife, too)
Another thing you can do is light it, and once it looks like the wax is going to spill from under the lip (it will look a little transparent where the underside of the mouth meets the neck) - gently blow the candle out and pluck the ring of the mouth off .. let the liquid wax cool a minute before doing this ; ) Save that wax ring and drop in into the pool later for extra burn time ; )
**As with all our candles - keep the wick short, 1/4 -ish. Be mindful that the wick isn't leaning off centered in one direction, which can cause uneven melting of the rim and spill the wax (true of all candles). In the event of a leaning wick, just poke at it with your scissors to set it up straight ; )
-- FRENCH CAFÉ --
Md.

This bottle is a nice, carefree burn. Just follow the general protocol of trimming the wick when it curls (about 1/4 inch .. or right below the bend) and burn this one for about a 1 hour or 1 & 1/2, and you'll love watching this little one go ; )
**As with all our candles - keep the wick short, 1/4 -ish. Be mindful that the wick isn't leaning off centered in one direction, which can cause uneven melting of the rim and spill the wax (true of all candles). In the event of a leaning wick, just poke at it with your scissors to set it up straight ; )
**As with all our candles - keep the wick short, 1/4 -ish. Be mindful that the wick isn't leaning off centered in one direction, which can cause uneven melting of the rim and spill the wax (true of all candles). In the event of a leaning wick, just poke at it with your scissors to set it up straight ; )
--KEYTHEDRAL --
Md.

This candle is fairly narrow, (about 1 & 1/2 inches) so make sure it stays level and out of a breeze. Your wax pool, naturally, spreads out from the flame in a circle, and since this piece is square, you'll need to mind your burn times, so you don't spring a leak in the side walls ; ) If you do spring a leak - just blow the candle out and let it cook for next time. Upon relighting, the flame will cut a new cup to hold your wax pool ; )
1 or 1 & 1/2 hour burns are good for this one - we've gone longer, but it's best to keep an eye on it during longer burns to make sure it's on the straight and narrow : )
Also, it's extra important to make sure that your wick stays short and centered. The wick will naturally curl when it's getting too long - that can displace too much heat on one wall and spill your wax. When the wick curls, trim it right below the bend, and if it's short but still off center, just give it a little poke with your scissors to straighten it out. Poking and trimming goes a long way with all of our candles ; )
One special trick with the flared mouth:
This is one of the few candles that we have with a flared mouth. This unsupported wax will cause a little dripping as it turns liquid and falls away.If you want less drips (they do look kind of cool though), just pinch the thin lip and snap it off all the way around the top of the neck. (you can tap it with the back side of a butter knife, too). Now, with just the narrow neck to start, you'll have a cleaner, less drippy burn ;)
Another thing you can do is light it up, and once it looks like the wax is going to spill from under the lip (it will look a little transparent where the underside of the mouth meets the neck) - gently blow the candle out and pluck the ring of the mouth off .. let the liquid wax cool a minute before doing this ; ) Save that wax ring and drop in into the pool later for extra burn time ; )
Another thing you can do is light it up, and once it looks like the wax is going to spill from under the lip (it will look a little transparent where the underside of the mouth meets the neck) - gently blow the candle out and pluck the ring of the mouth off .. let the liquid wax cool a minute before doing this ; ) Save that wax ring and drop in into the pool later for extra burn time ; )
... this is a really cool candle, but loves attention. If you burn it mindfully, and make a nice little pit through the body, the key will actually stand up above the wax pool for a while before the heat of the flame claims it as its own ; )
-- Md. POISON --
Md.


Most of our candles are round or square - round ones burn the best as it follows the same natural shape of the wax pool, but this poison is a funny, diamond shape, and needs extra care while burning.
The best way to burn this candle is for short periods - one hour or less. Keep the wick extra short and straight to avoid drips. If your candle drips, just blow it out and let it cool - next time you light it, the pit will sink lower and hold your wax pool nicely ; )
As you're nearing the one-hour marker - just keep an eye on it, and if you see a little hole coming through the wall, (most times happens on the thin chest of the candle) gently blow it out, or hold a cup or jar over the flame to cut off the oxygen without risking spilling the wax with the force of your breath.
One special trick with the flared mouth:
This is one of the few candles that we have with a flared mouth. This unsupported wax will cause a little dripping as it turns liquid and falls away.If you want less drips (they do look kind of cool though), just pinch the thin lip and snap it off all the way around the top of the neck. (you can tap it with the back side of a butter knife, too). Now, with just the narrow neck to start, you'll have a cleaner, less drippy burn ;)
Another thing you can do is light it up, and once it looks like the wax is going to spill from under the lip (it will look a little transparent where the underside of the mouth meets the neck) - gently blow the candle out and pluck the ring of the mouth off .. let the liquid wax cool a minute before doing this ; ) Save that wax ring and drop in into the pool later for extra burn time ; )
-- SNAKE OIL --
Md. $20

This candle is fairly narrow, so make sure it stays level and out of a breeze. Your wax pool, naturally, spreads out from the flame in a circle, and since this piece is square, you'll need to mind your burn times, so you don't spring a leak in the side walls ; )
A one hour (or less) burn is good for this candle. Also, it's extra important to make sure that your wick stays short and centered. The wick will naturally curl when it's getting too long - that will displace too much heat onto one wall and can spill your wax. When the wick curls, trim it right below the bend, and if it's short but still off center, just give it a little poke with your scissors to straighten it out. Poking and trimming goes a long way with all our candles ; )
-- Md L. ROSE --
Md.


This is a great, carefree, long burning candle ; ) At the begging of the first burn, the small lip will melt and crate a wax bubble .. you can either tip the candle to spill the wax in a direction that you want, or just let it happen naturally. After that - this candle can be burned for long or short periods - 1 hour to 3 or 4 .. just make sure the walls don't melt away completely - that's what holds the liquid pool in ; )
**As with all our candles - keep the wick short, 1/4 -ish. Be mindful that the wick isn't leaning off centered in one direction, which can cause uneven melting of the rim and spill the wax (true of all candles). In the event of a leaning wick, just poke at it with your scissors to set it up straight ; )
**As with all our candles - keep the wick short, 1/4 -ish. Be mindful that the wick isn't leaning off centered in one direction, which can cause uneven melting of the rim and spill the wax (true of all candles). In the event of a leaning wick, just poke at it with your scissors to set it up straight ; )
-- GREENFIELD DAIRY ½ PINT --
Md.

This Dairy pint is the the point when you start moving into our thicker candles which can be burned for longer periods of time ; )
Best burned for 2 - 3 hours at a time .. you can alternate longer and shorter burns .. as with all our candles, just make sure that the wax walls, which hold in your liquid pool, don't melt away and spill.
There's one trick with this dairy bottle/ its wide mouth.
*** This trick is not really necessary with the dairies - because most times the lip just kind of floats down as the candle burns, and you can nudge it into the wax pool later.
Our candles with wide mouths can drip a bit at the start because the overhanging rim has nothing below it to hold in the wax as it melts, so what we do .. and it's actually pretty fun .. is burn it for about an 1 or 1 & 1/2 hours the first time. Let the wax pool melt into the wide mouth, so the cool wax lip is just kind of sitting there above the liquid wax pool, and when it looks like you might spring a leak under the lip, gently blow out the candle and let it cool for 2 or 3 minutes. Then, gently pluck the whole ring off the top of the candle ; ) You can relight the candle now, or let it cool for next time. After that, the body should hollow out nicely, creating its own little cup, dripless and glowing bright ; )
**As with all our candles - keep the wick short, 1/4 -ish. Be mindful that the wick isn't leaning off centered in one direction, which can cause uneven melting of the rim and spill the wax (true of all candles). In the event of a leaning wick, just poke at it with your scissors to set it up straight ; )
-- 5¢ DAIRY ½ PINT --
Md.


Please read the blurb for the other Dairy pint above ; )

The milk men ; )

-- ATLAS MASON -
Md.


The Mason Jars are 100% dripless, long and easy burning candles ; ) One thing to be mindful of is making sure that you burn this one for long enough on the first go - about 2 & 1/2 to 3 hours. Candles burn down first and out second, so it's important to let your wax pool go wide, almost all the way to the edge of the cap (leaving a solid wax rim about 1/4 of an inch all the way around ((see pic above)). After that, you can burn shorter occasionally, but make sure that you give it a nice long burn every few times, so the wax walls run down into the pool, and you get as many burn hours as possible.
Note - the cap will eventually thin out and melt into the pool, but if you want to keep it around longer - it glows so beautifully - then burn it for shorter periods the first 2 times (maybe 2 hours) .. this will leave a thicker rim of the cap, and it will melt away slower ; )
**As with all our candles - keep the wick short, 1/4 -ish. Be mindful that the wick isn't leaning off centered in one direction, which can cause uneven melting of the rim and spill the wax (true of all candles). In the event of a leaning wick, just poke at it with your scissors to set it up straight ; )
--DREY MASON --
Md.


Please read the blurb on the Atlas Mason above ; )

-- INFANT'S FOOD --
Md.


This is another one of our thicker candles which can be burned for longer periods of time ; )
The thin lip of this candle will drip a few times during the first burn - if you have a direction that you'd like the drips to run (like away from the text) just tip the candle in that direction when you see the unsupported wax bubble forming at the top. Keep the hardened wax drippings and drop back into the wax pool later for extra burn time ; )
Best burned for 2 - 3 hours at a time .. you can alternate longer and shorter burns .. but as with all our candles, just make sure that the wax walls, which hold in your liquid pool, don't melt away and spill.
-- PAN'S PERFUME --
Md.


Being a bit narrow, this Perfume bottle is best burned for about an hour at a time. Every time you burn it, the flame will cut a little deeper into the body, giving you a nice little wax pool.
This can be a bit of a tricky one through - One, this has the widest flared mouth in our line. The mouth and lip on most of our bottles will form a small unsupported wax bubble when they start to melt (this will happen in the first few minutes of your initial burn). Candles with a small mouth will only drip a few times, but this wide mouth can drip a lot.
Important:
Our suggestion for this is, painfully, before you burn it the first time, snap off the lip, leaving behind just the thin, clean burning neck. The wax chips can be dropped back into the wax pool later on when the wick is long ; ) You can snap it off with your fingers or use the back side of a butter knife to break it off. This will give you a cleaner burn with less initial drips.
You'll notice another flared section at the shoulder of the bottle, most times this will just sink down with the candle as it melts through, but it can also sag to one side if your wick isn't straight and short. Something you can do to avoid this is to wait until the wax pool has sunk below the wide shoulder and then blow the candle out. After 2 or 3 minutes of cooling, you can actually reach down and pluck the whole shoulder ring off ; ) Beautiful and complicated .. such is loVe.
**As with all our candles - keep the wick short, 1/4 -ish. Be mindful that the wick isn't leaning off centered in one direction, which can cause uneven melting of the rim and spill the wax (true of all candles). In the event of a leaning wick, just poke at it with your scissors to set it up straight ; )
-- HOLY WATER --
Md.


This Holy Water is a great, long burner which can go for 3 or 4 hours at a time .. or longer. It has a slightly flared ring, which can drip a bit at first, but you can also use this trick to avoid that:
Our candles with wide mouths can drip a bit at the start because the overhanging rim has nothing below it to hold in the wax as it melts, so what we do .. and it's actually pretty fun .. is burn it for about an 1 or 1 & 1/2 hours the first time. Let the wax pool melt into the wide mouth, so the cool wax lip is just kind of sitting there above the liquid wax pool, and when it looks like you might spring a leak under the lip, gently blow out the candle and let it cool for 2 or 3 minutes. Then, gently pluck the whole ring off the top of the candle ; ) You can relight the candle now, or let it cool for next time. After that, the body should hollow out nicely, creating its own little cup, dripless and glowing bright ; )
It's best to make sure that your wax walls stay pretty thick (about 1/4 inch) as you're getting into the body of the candle. (this will be easiest to do with 2 or 2 & 1/2 hour burns for the first 3 or 4 sessions once you've reached the thick body). The reason for this, if you want to see the cross glow as long as possible, is that it will keep the stability in the front wax wall (with the cross.) Burning too long can make the walls thin and melt the image into the candle. After you get about midway, feel free to burn longer, so the upper wax walls will have a chance to run into the pool and give you the most burn hours ; )
**As with all our candles - keep the wick short, 1/4 -ish. Be mindful that the wick isn't leaning off centered in one direction, which can cause uneven melting of the rim and spill the wax (true of all candles). In the event of a leaning wick, just poke at it with your scissors to set it up straight ; )
--------------------------------LARGE-------------------------------
-- Lg. OWL DRUG CO. --
Lg.

This is a great candle - not so thick that it has to be burned for many hours at a time, but thick enough to go through a nice long dinner or a bundle of pages in your favorite book ; )
Best burned for 2 or 3 hours at a time - just wait until the flame is behind the owl, and it glows and comes to life ; ) Speaking of which, it's best to make sure that your wax walls stay pretty thick (about 1/4 inch) as you're getting into the body of the candle. (this will be easiest to do with 2 or 2 & 1/2 hour burns for the first 3 or 4 sessions once you've reached the thick body). The reason for this, if you want to see the owl glow as long as possible, is that it will keep the stability in the front wax wall (with the owl.) Burning too long can make the walls thin and melt the image into the candle. After you get about midway, feel free to burn longer, so the upper wax walls will have a chance to run into the pool and give you the most burn hours ; )
The thin lip of this candle will drip a few times during the first burn - if you have a direction that you'd like the drips to run (like away from the text or images) just tip the candle in that direction when you see the unsupported wax bubble forming at the top.
**As with all our candles - keep the wick short, 1/4 -ish. Be mindful that the wick isn't leaning off centered in one direction, which can cause uneven melting of the rim and spill the wax (true of all candles). In the event of a leaning wick, just poke at it with your scissors to set it up straight ; )
-- CHANTEAUD PARIS --
Lg.

I like to burn this one for short periods (45 min to 1 hour) the first two or three times I light it. This will hollow out a little cup in the neck, without melting the neck away completely. It looks great as it glows and creates a nice deep cup in the neck to hold the wax pool as you burn farther down.
This candle is best burning for 2 to 3 hour spans ; ) You can burn longer, just follow the steps below, and make sure that you don't melt your wax walls away completely because those are what hold your wax pool in ; )
**As with all our candles - keep the wick short, 1/4 -ish. Be mindful that the wick isn't leaning off centered in one direction, which can cause uneven melting of the rim and spill the wax (true of all candles). In the event of a leaning wick, just poke at it with your scissors to set it up straight ; )

Here's the two French bottles together ; )
-- ACME SODA WATER --
Lg.

(front)

("blob top" neck)


(back logo)

This is such a nice burn - when the "blob top" neck starts to burn down, it cups into a beautiful goblet shape, and once you're melting into the body, you'll enjoy a dripless, glowing beauty ; )
This bottle can burn for long periods - 4 or 5 hours at a time, but 2 to 3 would bee great !! There's no special tips on this one, super easy long burn ; )
**As with all our candles - keep the wick short, 1/4 -ish. Be mindful that the wick isn't leaning off centered in one direction, which can cause uneven melting of the rim and spill the wax (true of all candles). In the event of a leaning wick, just poke at it with your scissors to set it up straight ; )
-- JACKSON'S SODA WATER --
Lg.

(front)

(back)


This bottle can burn for long periods - 4 or 5 hours at a time, but 2 to 3 would bee great !! There's no special tips on this one, super easy long burn ; )
The thin lip of this candle will drip a few times during the first burn - if you have a direction that you'd like the drips to run (like away from the text) just tip the candle in that direction when you see the unsupported wax bubble forming at the top.
**As with all our candles - keep the wick short, 1/4 -ish. Be mindful that the wick isn't leaning off centered in one direction, which can cause uneven melting of the rim and spill the wax (true of all candles). In the event of a leaning wick, just poke at it with your scissors to set it up straight ; )
-- SODA POP --
Lg.


This bottle can burn for long periods - 4 or 5 hours at a time, but 2 to 3 would bee great !! There's no special tips on this one, super easy long burn ; )
The thin lip of this candle will drip a few times during the first burn - if you have a direction that you'd like the drips to run (like away from the text) just tip the candle in that direction when you see the unsupported wax bubble forming at the top.
**As with all our candles - keep the wick short, 1/4 -ish. Be mindful that the wick isn't leaning off centered in one direction, which can cause uneven melting of the rim and spill the wax (true of all candles). In the event of a leaning wick, just poke at it with your scissors to set it up straight ; )
-- Imported Olive Oil --
Lg.


This bottle can burn for long periods - 4 or 5 hours at a time, but 2 to 3 would bee great !! There's no special tips on this one, super easy long burn ; )
The thin lip of this candle will drip a few times during the first burn - if you have a direction that you'd like the drips to run (like away from the text) just tip the candle in that direction when you see the unsupported wax bubble forming at the top.
**As with all our candles - keep the wick short, 1/4 -ish. Be mindful that the wick isn't leaning off centered in one direction, which can cause uneven melting of the rim and spill the wax (true of all candles). In the event of a leaning wick, just poke at it with your scissors to set it up straight ; )
-- Lg. FLORIDA WATER --
(shown with Mini FL Water)
Lg.

This bottle can burn for long periods - 3 or 4 hours at a time, but 2 to 3 would bee great !! There's no special tips on this one, super easy long burn ; )
The thin lip of this candle will drip a few times during the first burn - if you have a direction that you'd like the drips to run (like away from the text) just tip the candle in that direction when you see the unsupported wax bubble forming at the top.
**As with all our candles - keep the wick short, 1/4 -ish. Be mindful that the wick isn't leaning off centered in one direction, which can cause uneven melting of the rim and spill the wax (true of all candles). In the event of a leaning wick, just poke at it with your scissors to set it up straight ; )
--RIBBED POISON --
Lg.


This bottle can burn for long periods - 4 or 5 hours at a time, but 2 to 3 would bee great !! There's no special tips on this one, super easy long burn ; )
The thin lip of this candle will drip a few times during the first burn - if you have a direction that you'd like the drips to run (like away from the text) just tip the candle in that direction when you see the unsupported wax bubble forming at the top.
**As with all our candles - keep the wick short, 1/4 -ish. Be mindful that the wick isn't leaning off centered in one direction, which can cause uneven melting of the rim and spill the wax (true of all candles). In the event of a leaning wick, just poke at it with your scissors to set it up straight ; )
-- 1 LB. HONEY --
Lg.

This bottle can burn for long periods - 3 or 4 hours at a time, but 2 to 3 would bee great !! There's no special tips on this one, super easy long burn ; )
**As with all our candles - keep the wick short, 1/4 -ish. Be mindful that the wick isn't leaning off centered in one direction, which can cause uneven melting of the rim and spill the wax (true of all candles). In the event of a leaning wick, just poke at it with your scissors to set it up straight ; )
-- ROOT MASON --
Lg.


The Mason Jars are 100% dripless, long and easy burning candles ; ) One thing to be mindful of is making sure that you burn this one for long enough on the first go - about 2 & 1/2 to 3 hours. Candles burn down first and out second, so it's important to let your wax pool go wide, almost all the way to the edge of the cap (leaving a solid wax rim about 1/4 of an inch all the way around ((see pic above)). After that, you can burn shorter occasionally, but make sure that you give it a nice long burn every few times, so the wax walls run down into the pool, and you get as many burn hours as possible.
Note - the cap will eventually thin out and melt into the pool, but if you want to keep it around longer - it glows so beautifully - then burn it for shorter periods the first 2 times (maybe 2 hours) .. this will leave a thicker rim of the cap, and it will melt away slower ; )
**As with all our candles - keep the wick short, 1/4 -ish. Be mindful that the wick isn't leaning off centered in one direction, which can cause uneven melting of the rim and spill the wax (true of all candles). In the event of a leaning wick, just poke at it with your scissors to set it up straight ; )

(ROOT PINT W/ ATLAS 1/2 PINT)
-- 5¢ DAIRY PINT --
Lg.

(front)

(back)

This full-pint Dairy burns well .. and long ; ) Burn for 2 - 3 hours at a time through the more-slender neck, and you can then go for 4, 5, 6 hours at a time in the thick body ; )
There's one trick with this dairy bottle/ its wide mouth:
*** This trick is not really necessary with the dairies - because most times the lip just kind of floats down as the candle burns, and you can nudge it into the wax pool later.
Our candles with wide mouths can drip a bit at the start because the overhanging rim has nothing below it to hold in the wax as it melts, so what we do .. and it's actually pretty fun .. is burn it for about an hour and a half the first time. Let the wax pool melt into the wide mouth, so the cool wax lip is just kind of sitting there above the liquid wax pool, and when it looks like you might spring a leak under the lip, gently blow out the candle and let is cool for 2 or 3 minutes. Then, gently pluck the whole ring off the top of the candle ; ) You can relight the candle now, or let it cool for next time. After that, the body should hollow out nicely, crating its own little cup, dripless and glowing bright ; )
**As with all our candles - keep the wick short, 1/4 -ish. Be mindful that the wick isn't leaning off centered in one direction, which can cause uneven melting of the rim and spill the wax (true of all candles). In the event of a leaning wick, just poke at it with your scissors to set it up straight ; )

(FRONT & BACK)
-----------------------X-LARGE ----------------------
-- BLOOD & SKIN PURIFICATION --
XL.


Burn: Once into the thick body of this candle, you can burn from 2 - 4 hours at a time. The neck can burn for as short or as long of a period as you'd like. If you plan on burning straight through the neck in one session - about 3 or 4 hours - then be ready to trim the wick a few times as the wick can grow quite long as it cuts through this skinny neck (if you see a tall flame and a curved wick, it's time to trim.) Once in the thick body, a wide wax pool will form, and the burn will slow down. Trim every few hours or before you relight the candle each time.
The thin lip of this candle will drip a few times during the first burn - if you have a direction that you'd like the drips to run (like away from the text) just tip the candle in that direction when you see the unsupported wax bubble forming at the top.
**As with all our candles - keep the wick short, 1/4 -ish. Be mindful that the wick isn't leaning off centered in one direction, which can cause uneven melting of the rim and spill the wax (true of all candles). In the event of a leaning wick, just poke at it with your scissors to set it up straight ; )
-- XL. OWL DRUG CO. --
XL.

This is a great candle - not so thick that it has to be burned for many hours at a time, but thick enough to go through a nice long dinner or a bundle of pages in your favorite book ; )
Best burned for 3 or 4 hours at a time - and just wait until the flame is behind the owl, and it glows and comes to life ; ) Speaking of which, it's best to make sure that your wax walls stay pretty thick (about 1/4 inch) as you're getting into the body of the candle. (this will be easiest to do with 2 or 2 & 1/2 hour burns for the first 4 or 5 sessions once you've reached the thick body).
The reason for this, if you want to see the owl glow as long as possible, is that it will keep the stability in the front wax wall (with the owl.) Burning too long can make the walls thin and melt the image into the candle. After you get about midway, feel free to burn longer, so the upper wax walls will have a chance to run into the pool and give you the most burn hours ; )
The thin lip of this candle will drip a few times during the first burn - if you have a direction that you'd like the drips to run (like away from the text or images) just tip the candle in that direction when you see the unsupported wax bubble forming at the top.
**As with all our candles - keep the wick short, 1/4 -ish. Be mindful that the wick isn't leaning off centered in one direction, which can cause uneven melting of the rim and spill the wax (true of all candles). In the event of a leaning wick, just poke at it with your scissors to set it up straight ; )

(Lg. & XL. owls)
-- Maple --
XL.


Burn: Once into the thick body of this candle, you can burn from 5 - 6 hours at a time. The neck can burn for as long or as short of a period as you'd like. If you plan on burning straight through the neck in one session - about 4 - 5 hours - then be ready to trim the wick a few times as the wick can grow quite long as it cuts through this skinny neck (if you see a tall flame and a curved wick, it's time to trim.) .. once in the thick body, a wide wax pool will form, and the burn will slow down. Trim every few hours or before you relight the candle each time.
The thin lip of this candle will drip a few times during the first burn - if you have a direction that you'd like the drips to run (like away from the text) just tip the candle in that direction when you see the unsupported wax bubble forming at the top.
**As with all our candles - keep the wick short, 1/4 -ish. Be mindful that the wick isn't leaning off centered in one direction, which can cause uneven melting of the rim and spill the wax (true of all candles). In the event of a leaning wick, just poke at it with your scissors to set it up straight ; )
-- L. ROSE LIME JUICE - XL --
XL.


Burn: Once into the thick body of this candle, you can burn from 5 - 6 hours at a time. The neck can burn for as long or as short of a period as you'd like. If you plan on burning straight through the neck in one session - about 4 - 5 hours - then be ready to trim the wick a few times as the wick can grow quite long as it cuts through this skinny neck (if you see a tall flame and a curved wick, it's time to trim.) .. once in the thick body, a wide wax pool will form, and the burn will slow down. Trim every few hours or before you relight the candle each time.
The thin lip of this candle will drip a few times during the first burn - if you have a direction that you'd like the drips to run (like away from the text) just tip the candle in that direction when you see the unsupported wax bubble forming at the top.
**As with all our candles - keep the wick short, 1/4 -ish. Be mindful that the wick isn't leaning off centered in one direction, which can cause uneven melting of the rim and spill the wax (true of all candles). In the event of a leaning wick, just poke at it with your scissors to set it up straight ; )
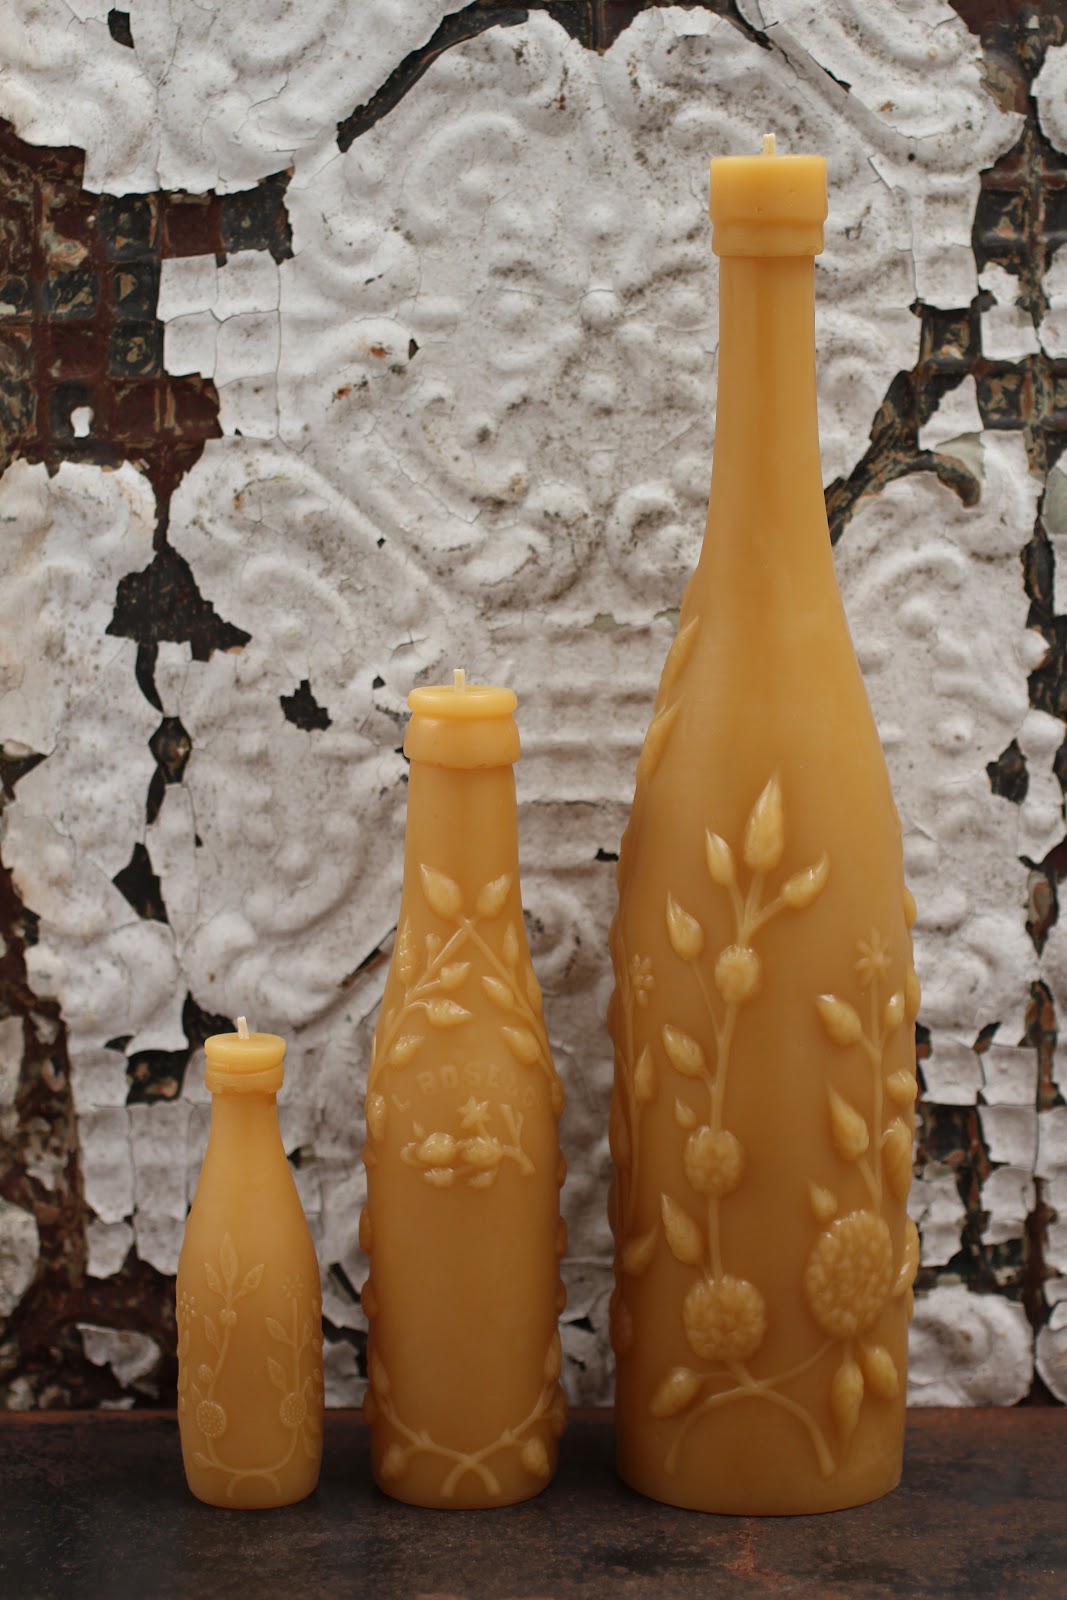
(Mini, Md, and XL L. Rose Bottles)


--TREE OF LIFE --
XXL

This is such a nice burn - when the neck starts to burn down, it cups into a beautiful goblet shape, and then once you're melting into the body, you'll enjoy a dripless, glowing beauty ; )
This bottle can burn for long periods - 7 to 10 hours at a time, but you can alternate between long burns and shorter ones .. so don't feel like you can't light it up because you don't have a long stretch. But do make sure to give it a good long burn every once in a while, so the walls will melt into the pool. This will give you more burn hours and thinner walls/ a brighter glow ; ) There's no special tips on this one, super easy long burn ; )
**As with all our candles - keep the wick short, 1/4 -ish. Be mindful that the wick isn't leaning off centered in one direction, which can cause uneven melting of the rim and spill the wax (true of all candles). In the event of a leaning wick, just poke at it with your scissors to set it up straight ; )


-- CHESTNUT FARMS DAIRY --
XXL.


This full-Quart Dairy burns so well .. and long ; ) This candle can just go and go ... forever. Burn for 2 - 3 hours at a time through the more slender neck, and then you can go for 7, 8, 10 hours at a time in the thick body ; )
There's one trick with this dairy bottle/ its wide mouth.
*** This trick is not really necessary with the dairies - because most times the lip just kind of floats down as the candle burns, and you can nudge it into the wax pool later.
Our candles with wide mouths can drip a bit at the start because the overhanging rim has nothing below it to hold in the wax as it melts, so what we do .. and it's actually pretty fun .. is burn it for about an hour and a half the first time. Let the wax pool melt into the wide mouth, so the cool wax lip is just kind of sitting there above the liquid wax pool, and when it looks like you might spring a leak under the lip, gently blow out the candle and let is cool for 2 or 3 minutes. Then, gently pluck the whole ring off the top of the candle ; ) You can relight the candle now, or let it cool for next time. After that, the body should hollow out nicely, crating its own little cup, dripless and glowing bright ; )
--CALDWELL'S RUM--
XXL.

This Rum is seriously one of our best burning candles - when the neck starts to burn down, it cups into a beautiful goblet shape, and then once you're melting into the body, you'll enjoy a dripless, glowing beauty ; )
This bottle can burn for long periods - 7 to 10 hours at a time, but you can alternate between long burns and shorter ones .. so don't feel like you can't light it up because you don't have a long stretch. But -do- make sure to give it a good long burn every once in a while, so the walls will melt into the pool - this gives you more burn hours and thinner walls/ a brighter glow through the wax ; ) There's no special tips on this one, super easy long burn ; )
The thin lip of this candle can drip a few times during the first burn - if you have a direction that you'd like the drips to run (like away from the text) just tip the candle in that direction when you see the unsupported wax bubble forming at the top.
**As with all our candles - keep the wick short, 1/4 -ish. Be mindful that the wick isn't leaning off centered in one direction, which can cause uneven melting of the rim and spill the wax (true of all candles). In the event of a leaning wick, just poke at it with your scissors to set it up straight ; )
-- New England Rum - 1941 XXL. --

This is another amazing long burner - when the neck starts to burn down, it cups into a beautiful goblet shape, and then once you're melting into the body, you'll enjoy a dripless, glowing beauty ; )
This bottle can burn for long periods - 7 to 10 hours at a time, but you can alternate between long burns and shorter ones .. so don't feel like you can't light it up because you don't have a long stretch. But -do- make sure to give it a good long burn every once in a while, so the walls will melt into the pool - this gives you more burn hours and thinner walls/ a brighter glow ; ) There's no special tips on this one, super easy long burn ; )
The thin lip of this candle can drip a few times during the first burn - if you have a direction that you'd like the drips to run (like away from the text) just tip the candle in that direction when you see the unsupported wax bubble forming at the top.
**As with all our candles - keep the wick short, 1/4 -ish. Be mindful that the wick isn't leaning off centered in one direction, which can cause uneven melting of the rim and spill the wax (true of all candles). In the event of a leaning wick, just poke at it with your scissors to set it up straight ; )


Here's our two Rum's together ; )

New England Back Reads: "ONE QUART."
This is a thick, heavy bottle and perfect for long and luxurious burning ; )
--OLD JUDGE COFFE Full-Quart Mason--
XXL.


The Mason Jars are 100% dripless, long and easy burning candles ; ) And this Giant of a candle can last you through the snowy season and then some ; ) One thing to be mindful of is making sure that you burn this one for long enough on the first go - about 2 & 1/2 to 3 hours in the cap, and then upwards of 4,5,6, hours at a time. We've left this one going for three straight days before, and it does great ; )
Candles burn down first and out second, so it's important to let your wax pool go wide, almost all the way to the edge of the cap (leaving a solid wax rim about 1/4 of an inch all the way around ((see pic above)). After that, you can burn shorter occasionally, but make sure that you give it a nice long burn every few times, so the wax walls run down into the pool, and you get as many burn hours as possible.
Note - the cap will eventually thin out and melt into the pool, but if you want to keep it around longer - it glows so beautifully - then burn it for shorter periods the first 2 times (maybe 2 hours) .. this will leave a thicker rim of the cap, and it will melt away slower ; )
**As with all our candles - keep the wick short, 1/4 -ish. Be mindful that the wick isn't leaning off centered in one direction, which can cause uneven melting of the rim and spill the wax (true of all candles). In the event of a leaning wick, just poke at it with your scissors to set it up straight ; )
For anyone new to these candles and wondering which ones to start out with, I recommend starting with any of the mason jars...dripless, long lasting, and absolutely stunning when lit from within! All of the candles are worth purchasing though, you really can't go wrong. Other than the mason jars, the inkwell trio is my favorite (plus they're a super affordable option, totally worth it). Enjoy!
ReplyDelete